Spring Cleaning! - A Fresh Interior in 15 Minutes or Less March 24 2016
You spend most of your time inside the car, so I think it's a logical place to start your detailing journey, particularly for novices.
This is true if the weather has been anything less than cooperative. You can pull the car into your car port, or garage out of the elements and get started immediately. There is little risk of damaging and scratching surfaces, so the process is more user friendly. That, and I haven't met a person who doesn't know how to vacuum. Let's get started.
Step 1: Remove all large items from the inside of your car. That is: everything that can't, or shouldn't be vacuumed. Don't miss a spot. Empty the glove compartments and center console. Remove the floor mats. Remove the old, crumpled receipts and the napkins from your door pockets. Dig under the seats and pull out those old water bottles, kids' toys, makeup or anything else that rolled away.
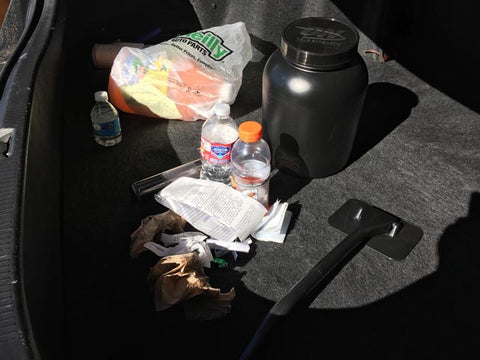
It's almost embarrassing to see how much trash you've lived with, and that's why it has to go!
When in doubt, refer to the flow chart. If I had 15 minutes to clean my interior before a date, this is where I would start.

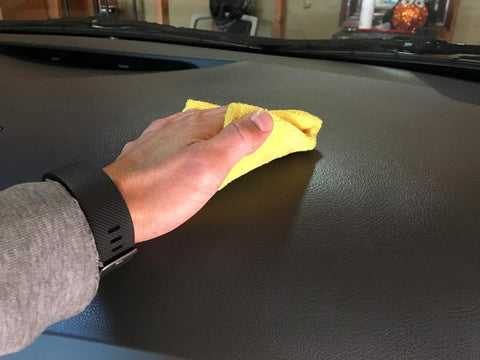
Step 2: Dust and vacuum to remove loose material. Anything more stubborn will have to be scrubbed out. Vacuum all surfaces. What can't be reached or removed with a vacuum can be whisked away with a damp microfiber towel. Cotton towels will work, but microfiber is a magnet for dirt.

If your vacuum has a brush attachment, I encourage you to use it to avoid scratching soft leather or fabric. Don't forget to vacuum crevices and seams. Filth collects in those places. When working on the seats and rubber trim, gently pry the material open and run your vacuum's crevice tool along the path to remove embedded dirt. You might have to loosen stuck material with a brush. I like to use a cheap toothbrush, or a paint brush with stiff bristles. The bristles are stiff enough to get the job done, but soft enough to avoid causing damage.
Here's your checklist:
- Headliner
- Dashboard
- Vents
- Door panels, sills, and jambs
- Buttons, knobs, and switches(radio, window, and others)
- Note: rock the buttons back and forth as you clean them to expose hidden surfaces
- Cup holders
- Storage compartments
- Seats (in, on, around, and under)
- Carpets
- Rear shelf
Step 3: Put back the items that weren't trash and belonged in the car. Original equipment is a given, but don't forget the little things. Use this list as a guide:
- Removable carpets
- Manuals, booklets, and literature
- Vehicle registration
- Jumper cables and tools
- Umbrellas
- Sun Shade
- First-aid kit
- Chargers
Put everything away neatly, out of sight if possible. Remember: a place for everything, and everything in its place. It may take more than 15 minutes, especially if you're overdue, but speed comes with experience. It's more important to do the job correctly than it is to do it quickly, so take your time. Remember: if your car was being judged, these are the qualities that can make you a winner.
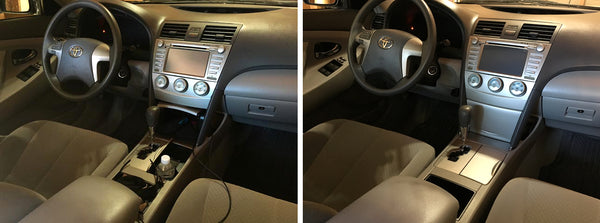
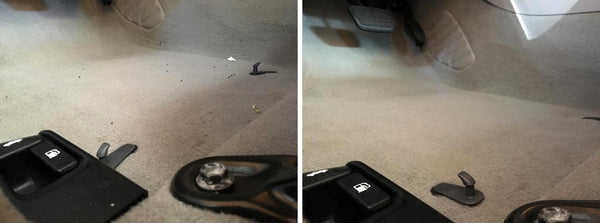
Before After