News
Don't Bother Detailing Without Clay Bar May 11 2017
It's that important. The clay bar may have been invented in 1990, but it has been rediscovered and redesigned in recent years. It's the most important tool in your detailing arsenal, next to your sponge, and you deserve to know why.
Have a long talk with any skilled professional, and they'll tell you that preparation is the most important part of their process. It's true for writers, craftsmen, and detailers alike. Your goal in the prep stage of any project is to lay the foundation for each subsequent step, so your work flows smoothly and effortlessly.
For connoisseurs and professionals who plan to polish their car's paint, clay is absolutely necessary. Machine polishers refine paint on a microscopic scale. These technicians spend hours removing paint by the micron until surfaces are clean and level. The nuances of machine polishing can be saved for another day, but what you need to know is this:
Polishers spin at thousands of RPM or OPM (orbitals per minute) while whisking away microscopic paint particles with fine, precisely engineered abrasives. If dirt, or embedded contaminants get stuck between the paint and the polishing pad, they will grind into the surface aggressively, leaving a marred finish.
I can tell you, from personal experience, that it's extremely frustrating and not always apparent at first glance. Sometimes the light has to catch the surface just right for you to see entire panels hologrammed or micromarred into oblivion. Wasted time. Wasted product. Wasted money. All of which could have been avoided with diligent preparation.
Clay is just as beneficial for the weekend detailer who just wants a wash 'n wax for the next show 'n shine. Embedded dirt is a barrier between wax and your paint. Use a clay bar, and remove microscopic contaminants that diffuse light as it strikes the paint. Use a clay bar, and your wax will have a stronger bond with the surface. Most car waxes contain fillers to hide light scratches, hazing, and swirl marks. When you clay, you open voids in the paint, allowing wax to fill them and cover the damage.
TL;DR -- Claying your car improves the shine and helps wax last longer while doing its job right. Simple enough?
The detailing world doesn't need another wax or brush, but it needs a reliable supplier of high-quality products. That's why Klaren chose to focus on surface prep products. We choose to inspect every mitt that goes out by hand. We choose to stand behind our clay mitts and offer a satisfaction guarantee. It's our commitment to you.
Weatherproof Windows February 01 2017
We're passionately committed to detailing, so there are a few things that get under our skin. Foggy, dirty windows? Inexcusable. You deserve better. Trust us. Once you've committed to this process, you'll never go back. Let this be your definitive guide to weatherproofing windows, making them crystal clear and improving your safety.
You will clean:
- The outside and inside of your windows
- Surrounding trim
Tools:
- Kleanmitt, microfiber towel, or gentle washing tool
- Kleanmitt, Pocket Clay, or traditional detailing clay (for claying process)
- Glass sealant - RainX Original Glass Water Repellent, Aquapel, or similar product
- Clean microfiber and/or cotton towels
Exterior
Step 1: Wash your windows. We've been through this process. Just remember that dirt collects in corners. Trace your washing tool along the frame of the window, so the fibers reach into the cracks and pull away dirt.
Step 2: Clay the glass. Do this either during, or after your wash routine.
We like using Pocket Clay to remove bugs and other funk because the hard edge of pocket clay traces the window perfectly. You won't miss a spot. A Kleanmitt, or even traditional detailing clay works fine too.
You will hear your clay picking up crud as it clicks and ticks across the surface. In extreme cases, contamination can be rough to the touch, and the clay may feel grabby, like it's sticking. Lubricate the surface liberally to avoid streaking the glass with the clay media. When the clay glides smoothly and quietly, you're finished with that section. When you're finished with the window, hose it off, or wipe it with a clean towel. A rinse is more thorough, but if you have limited access to running water, a thorough wipe down will do. Just turn your towel to a clean side after each pass. If the towel is still picking up dirt at this point, you're not done cleaning.
Step 3: Dry the windows
Option for the obsessive: Now is your opportunity to polish the glass using a cerium oxide-based polish and Rayon glass-polishing pads. There are no embedded particles on the glass, and no chance of picking them up with the pad, grinding them into the glass, and making your visibility worse.
For everyone else,
Step 4: Choose a glass sealant. Rain X original formula, Aquapel, or whatever you prefer. We like Rain X because it's a tremendous value for the performance, and you will often find it at local retailers.
Apply RainX using a cotton towel, microfiber towel, cotton applicator, or microfiber applicator. Do not use foam applicators. Rain X's formula breaks down the foam, and the foam applicator will disintegrate in your hand. Let the product dry to a haze, then remove it using a clean towel. If the product is difficult to remove, mist or sprinkle water on your towel, and you'll have an easier time.
Interior
Mist a clean towel with your favorite glass cleaner. We use a mixture of equal parts rubbing alcohol and water on non-tinted windows. For tinted windows, use a tint-safe cleaner like Invisible Glass, or quick-detailing spray.
You're almost done! Inspect the glass from different angles. It's best to bring the car into the sun and walk around it to look for hazing with a clean, dry towel in hand. If you see streaks, wipe the glass to remove them.
Have fun!
Jambin' Out October 13 2016
Jambs and seals are often overlooked, but I promise they'll be impossible to ignore when you're finished.
Here is your door, trunk, and hood jamb guide.
You will clean:
- Jambs
- Rubber seals and boots
- Threshold and sill trim
- Underside of the hood and trunk
- Hood and trunk shocks
- Plastic, rubber, and vinyl trim
Tools:
- Quick detailing spray, or car wash solution
- Bucket
- Kleanmitt, or a microfiber towel
- Detailing brushes, or a soft-bristled paint brush
- 303 Aerospace Protectant
- Sealant or wax
Step 1: Brush or Kleanmitt method: Dip your cleaning tool into the wash solution. Wring out excess moisture, so you don't drip water into the interior, and brush or wipe away the filth. Stubborn stains can be worked with the polymer side of the Kleanmitt.
Microfiber towel method: Spray or soak your microfiber towel with cleaning solution. wring out excess moisture. Spray the surface you're working on and wipe it with your towel to remove dirt. Flip to a clean section of the towel and repeat to reduce the likelihood of micromarring (fine scratches). Use a different towel when the one in hand is saturated with filth.
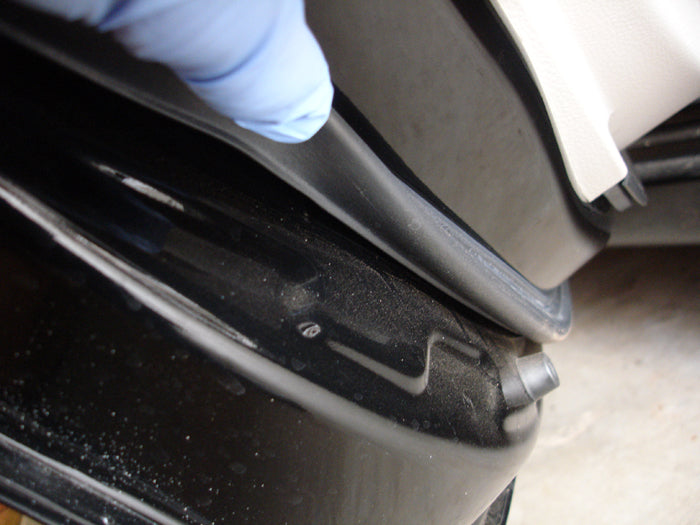
It wouldn't be called "detailing" if we weren't critical. It's time to get obsessive. If you haven't done it already, start your scavenger hunt for dirt by removing trim, tread plates and rubber seals if you can. If they're stuck to the car with adhesive, or too difficult to remove, gently pull the piece to the side to expose hidden areas, or wedge your cleaning tool in the gaps to mop up the mess.
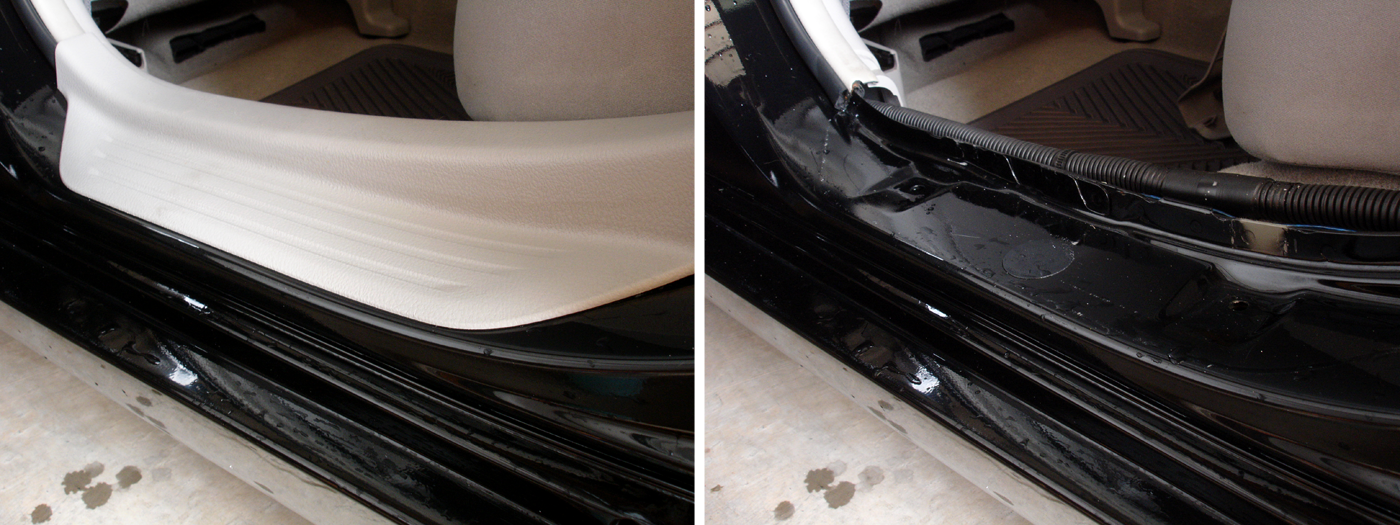
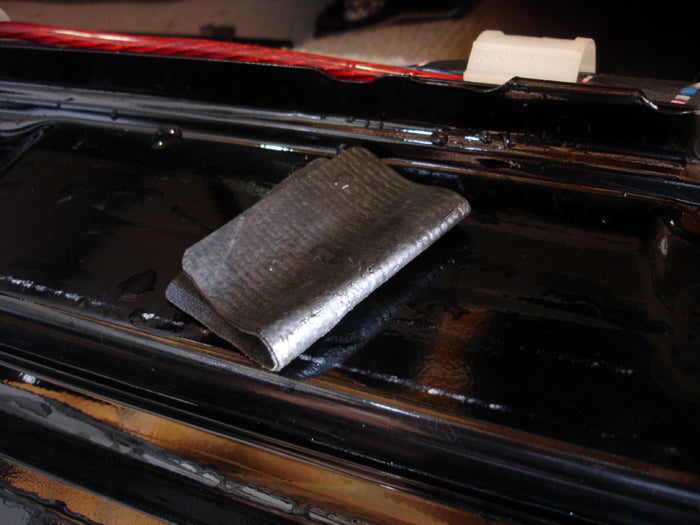
Bonus: If you plan on polishing the door jambs, now is a great time to clay the paint. For extra flexibility, we peeled the clay substrate from our pocket clay, which allowed us to fold it into corners and tight spaces.
Step 2: Dry the jambs. You can use a clean microfiber towel, an electric leaf blower, or compressed air. Whatever it takes to get the job done without damaging the paint.
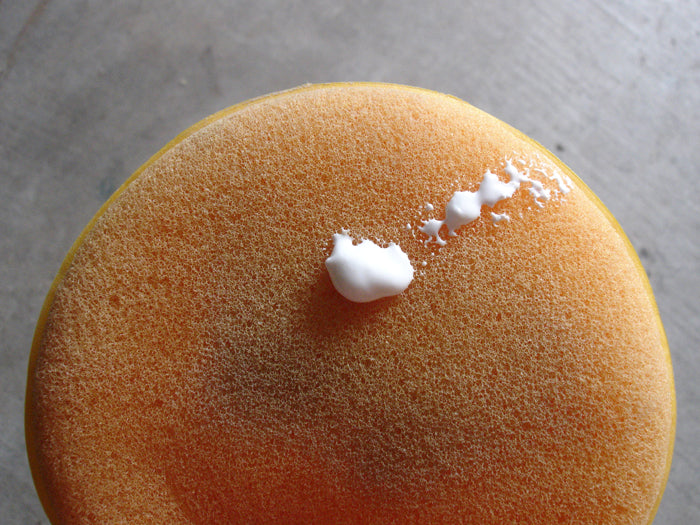
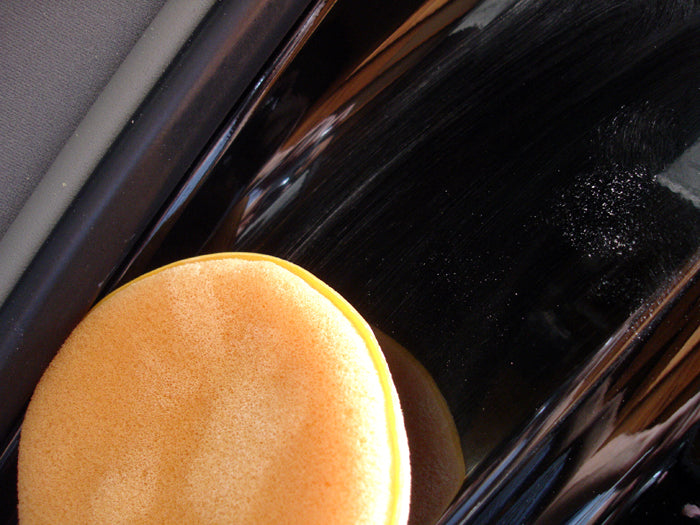
Bonus: Polish painted areas by hand to remove fine scratches. You don't need much product to take care of this. Usually a dime to nickel-sized dollop of polish or cleaner wax will do.
Our inspection light shows clear reflections, no scratches, and paint that's ready to be sealed.
Step 3: Apply wax or sealant to any painted areas. If you're using a paste wax, avoid rubbing plastic, rubber, or vinyl trim to prevent chalky, white marks. Using K5 isn't only recommended, but preferred since it will do double-duty, protecting all treated surfaces from grime without leaving a white residue.
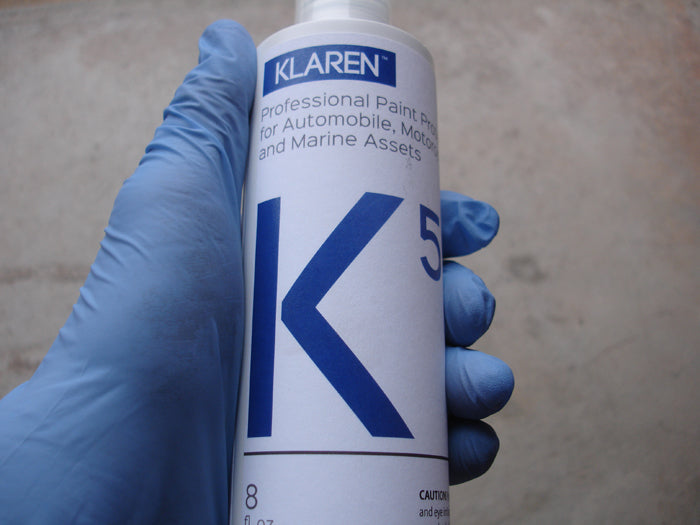
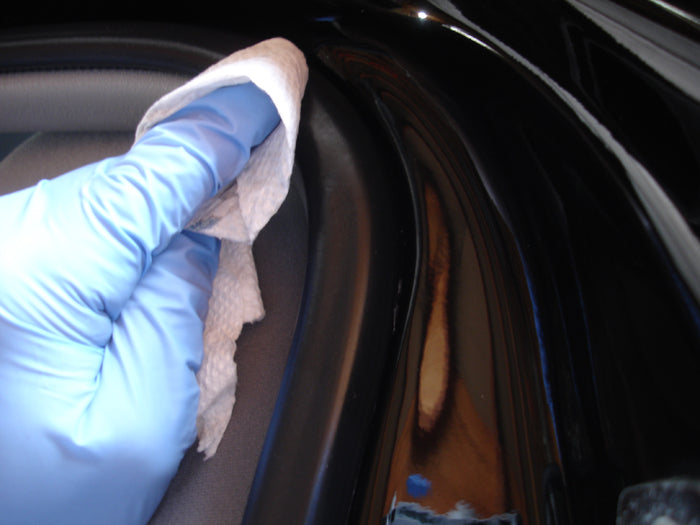
Carefully apply Klaren K5 or 303 Aerospace Protectant on plastic, vinyl, and rubber. With any spray product, spraying the applicator or towel instead of the surface will minimize over-spray. I prefer to use a foam applicator or microfiber towel, but I'm using a square of paper towel (on the rubber trim only) to illustrate a point: You can use what's available if it's safe. Be reasonable. Rubber won't scratch if I rub it with a paper towel. Paint will.
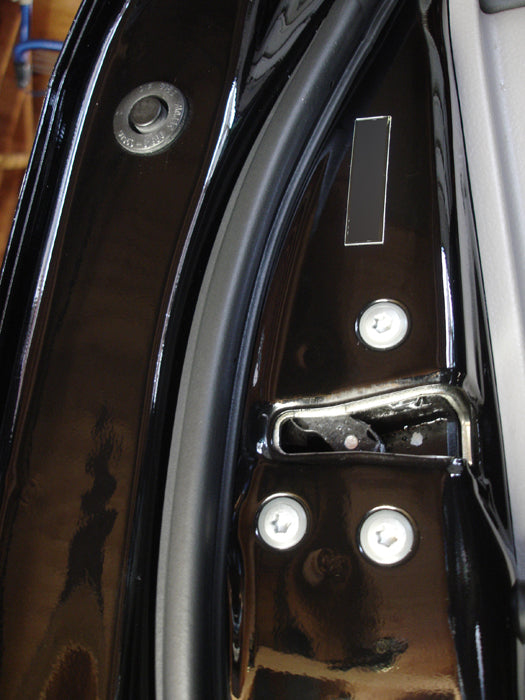
Voila! Step back. Did you miss a spot? Don't forget to put back anything you removed. That means no leftover screws or trim pieces on the garage floor when you're done! If not, you're good to go. Celebrate, and as always, have fun!
Complete Over Spray Removal May 29 2016
Our fascination with the Kleanmitt and new synthetic clay products is beyond measure. It seems like the life and versatility of the products is endless, and we're always finding new uses, especially at home.
I recently used an old Kleanmitt to completely remove overspray from my house's windows, and I'd like to share the experience.
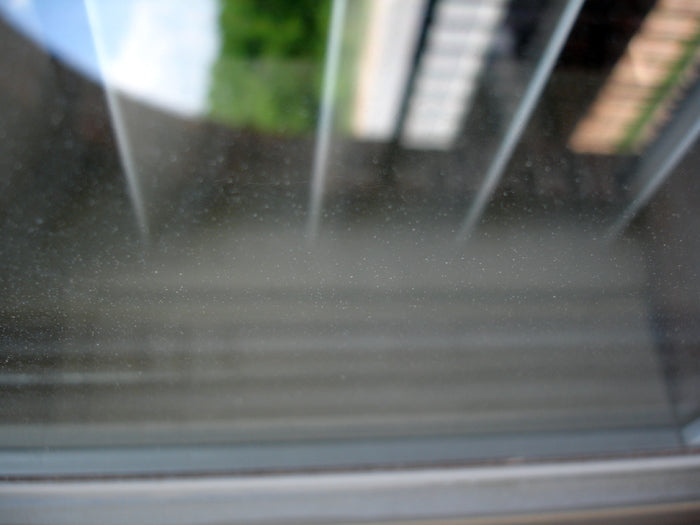
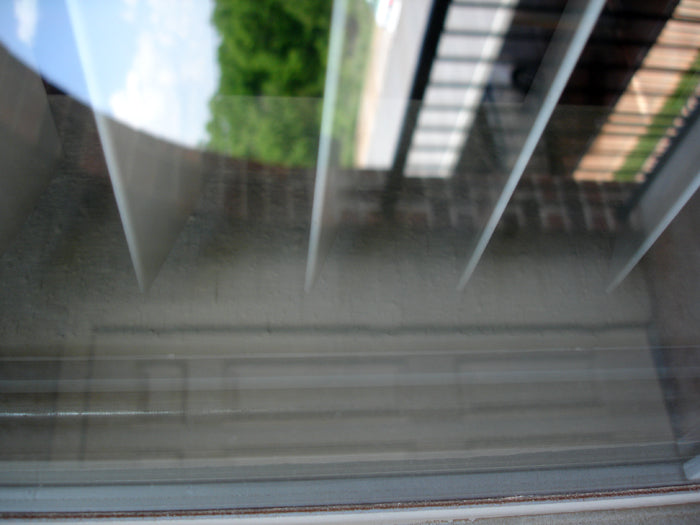
It was clear that the previous caretaker painted our house shortly before we moved in. How did I know? The windows were covered in pale over spray. It was difficult to capture in photos, but the effect was similar to having windows that are constantly dirty or dusty, as if they're covered in sand, even when they're clean.
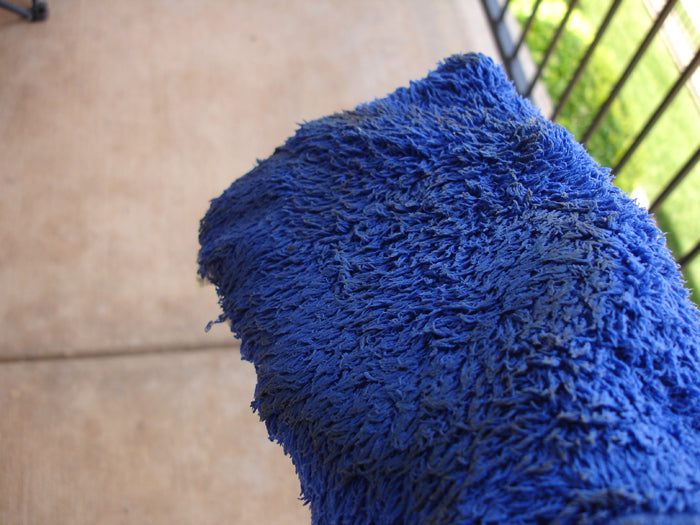
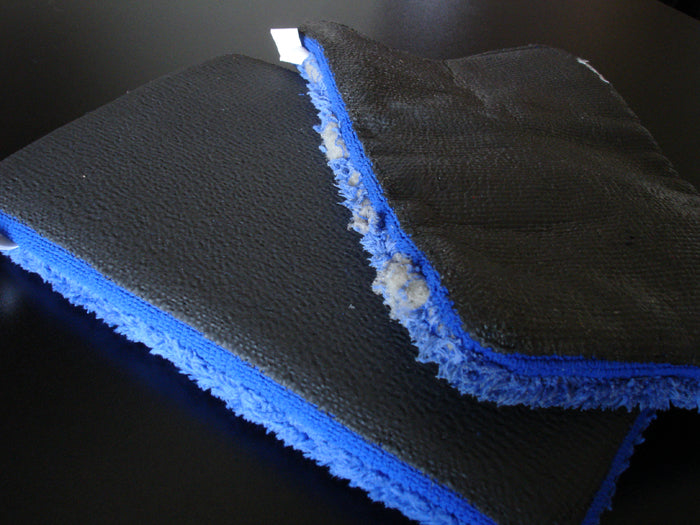
Normally, I'd try to remove the over spray using a razor blade (DO NOT TRY THIS ON AUTOMOTIVE PAINT) ...but I had a weathered Kleanmitt to spare. Since this was an experiment, I washed the windows using only water and the microfiber side of the mitt. You can see just how filthy it was with buildup.
The microfiber side did a great job picking up the slurry, and I gave it an extra pass or two to make sure the glass was clean. I used the clay side on the glass with water in a spray bottle as lubricant. I usually recommend using a waterless wash solution, or soapy water, but I was trying to eliminate as many variables as possible. The result was an immediate difference in slickness and clarity. The loud scratching sound caused by the clay passing over contamination was silenced in seconds as the tattered mitt lifted the old paint from the glass, and it was truly clean for the first time since I moved in.
The takeaway? My worn-out fine-grade Kleanmitt continues to perform exceptionally in other areas despite its condition.
You can tell by the comparison photo that it has been through the ringer.
I've already retired it from automotive use to prevent micromarring on paint, but it's still useful. For that reason, I recommend you keep your old mitts and pocket clay. They may be too filthy to use on paint safely, but I encourage you to test them on other surfaces and share your results. In my case, it saved a lot of time and validated the product's effectiveness even in less than ideal conditions.
Washing to Win - The Kleanmitt's Shining Moment May 17 2016
This is the next step in Concours prep after working on the wheels. Our Kleanmitts were made for this job. Whether you clay during the wash process or after, the time you save will surely impress you. Let's get started.
We're going to work on the vehicle body in sections.
You will clean:
- Roof
- Windows
- Everything above the belt line
- Everything below the belt line, including front and rear bumpers
The "belt line" is the protective door strip on your car. If your car doesn't have a door strip, define it using the body lines. The section below the belt line is often the filthiest, and we don't want to drag that dirt over the panels.
Tools:
- Klaren Kleanmitt
- Automotive Soap
- Detailing brushes, or a paint brush with soft bristles
- A wash bucket
Make sure your buckets are clean before you fill them (no dirt in the bottom or on the sides). Fill one with soap and water. If you have another, fill it with water only. We do this to avoid reintroducing dirt by contaminating the soapy water. If you don't have a second bucket, hose your mitt periodically to clean it.
If you're using a Kleanmitt or Pocket Clay, you have a choice to make: clay while washing, or clay after washing. Neither method is wrong.
If you clay during the wash: clean a section, rinse the filthy suds away, and clay using more soapy water as your lubricant. Claying after washing the whole car may take longer. It feels a lot like cleaning your car twice, but if your wash was thorough, we can guarantee that you won't grind filth into your paint. To each his own.
Rinse the vehicle from the top down. Always work from the top down, so you don't scratch the paint.
Step 1: Wash the roof of the car. If you have an SUV, there are often slots in the panel where dirt loves to accumulate. Guide your Kleanmitt, using your fingers to trace the grooves and remove all the grime you can. If your car has roof rails, clean around and beneath them, too. If you're obsessive, feel welcome to remove the roof rails.Rinse the car.
Step 2: Wash the hood, trunk, and windows of your car. Trace the crevices and seams along windows and panels. Microfiber will reach into tight corners in ways that a sponge cannot. Clean around your side mirrors. Lift the wiper blades. Use your mitt around, beneath, and on your wiper arms too.
Step 3: Work your way around the vehicle as you wash above the belt line. When you're finished, rinse the vehicle. Rinsing your tools and the car frequently takes more time, but minimizes the likelihood of creating scratches and swirls in the paint. Find the balance that works well for you.
Step 4: It's time to wash the grimiest parts of your car. If you're keen about not scratching the paint, rinse your Kleanmitt between passes. It will be loaded. This will be harder for people without direct access to a hose, which is why I recommended a rinse bucket, but spraying your Kleanmitt with the hose is the most effective way to release dirt. Wiping your paint with a dirty rag, towel, mitt, or sponge is like wiping it with sand paper, and I promise that the effects are just as damaging.
Use your brushes for tighter areas where the Kleanmitt won't fit. Dip them into the wash water, or pour a little soap on the bristles. It makes cleaning emblems, grilles, fog lights, and that little space above the license plate much easier. Threat them just like the mitt. If it's loaded, rinse it off. Fan out and massage the bristles if you need to, so they let go of the grime.
When you're finished, rinse the whole car and give it a once-over. Did you miss a spot? You washed under the rocker panels, right? How about the fold around the wheel arches? Look around the license plate, around the gas cap, and under door handles too. Attention to detail is the key to a stunning finish.
Dry the car quickly and completely. Standing water that's left behind can leave deposits, or etch little circles in your paint. The latter can't be removed with clay! We like using an electric leaf blower or compressed air for marr-free drying, but a clean microfiber towel is the next best thing.
Quick Tips:
Avoid water spots by washing your car in the early morning or late afternoon out of direct sunlight.
Always wash your car from top to bottom.
Rinse frequently, and keep the paint wet until you're finished.
Dry from the top down, similar to the way you washed the car.
If you're using a towel to dry the car and it's picking up dirt, STOP IMMEDIATELY. Reassess the paint and check for areas you missed during the wash.
Have fun!
Wheel Care Made Easy April 26 2016
Let's assume this is the first time I'm cleaning the wheels. It's going to be filthy.
You will clean:
- Wheel arches
- Suspension components
- Brake calipers
- Tires
- Wheel face
- Wheel Barrel
- Lug nuts
- Valve stem
Tools:
- Whitewall cleaner, or all-purpose cleaner (APC)
- Car soap, or wheel cleaner
- Sponges and/or soft brushes for the wheel face
- Stiff tire brushes
- Automotive clay (bonus)
This looks like a lot of material to digest, but I promise it will become automatic with practice. Read through the steps, use them, and refer back to the blog post when necessary. If you're stuck or still have questions, get in touch. We're here if you need us.
Step 1: Hose everything down, starting with the wheel arch. This washes away all loose dirt and debris. Spray APC inside the wheel arch, coating all surfaces and suspension components. Agitate with stiff-bristle brushes to remove stuck on debris, tar, and road grime, working the product into a lather. Softer brushes can be used if the contamination isn't stuck like glue.
Step 2: Rinse the wheel arch, and repeat Step 1. Wheel arches are especially grimy since the wheel is constantly assaulting them with small projectiles like dirt and tar.
Step 3: Spray the tires with whitewall cleaner, or APC. Dilute if necessary. Agitate with either a soft or hard-bristled brush. Hard bristle brushes are best for removing caked on tire gel. More often than not, the soft brush will do the job. As you agitate the cleaner it will produce a brown slurry. This is normal.
Tip: Roll the car back a couple feet to expose the lower part of the tire.
Step 4: Rinse the tire and repeat Step 3. By the second time, the lather should be white instead of yellow-brown. Rinse again. The tire is clean.
Step 5: If you have it, spray the face and the barrel of the wheel with wheel cleaner. Otherwise, if you're using a sponge or brush, dip it into a bucket mixed with water and car soap, and start scrubbing. Wheel barrel brushes and lug nut brushes are great investments, because they are durable and make easy work of hard-to-reach areas. You will use them every time you wash the wheels. Rinse the wheel when you're finished and inspect for leftover dirt. Repeat Step 5 if necessary.
Note: One of the best times to clean your wheels and tires is during a tire rotation. It pays to take advantage of the unobstructed access.
Bonus: when the wheel is clean, you can use Pocket Clay, an old Kleanmitt, or traditional clay bar to decontaminate the wheel. Anything on the surface, no matter how small, will diffract light and obscure reflections. Clay barring the wheel before polishing and sealing gives it extra visual pop.
Step 6: Dry the wheels, tires, and arches using an old towel, chamois, compressed air, or an electric leaf blower (our favorite is the Toro 51619). You'll love that last one. We've been using ours for years. It takes seconds to dry the wheels and leaves them spot-free.
Step 7: Wax the wheels. We prefer to use K5, our durable synthetic spray sealant. It capitalizes on the latest "liquid glass" SiO2 technology and protects our wheels for 6+ months. Water beads, dirt doesn't stick, and they're easier to clean during routine washes. All that, and they look phenomenal too. If you can, wax the caliper and wheel barrels. It adds extra visual depth. Few true detailers miss this critical step.
Note: Do not haphazardly spray sealant onto the wheel, caliper, or rotor! It's best to use a towel or applicator in these sensitive areas to keep the rotor clean. This is for your safety.
Step 8: Treat the tires and wheel arches with your favorite protectant or vinyl/rubber sealant. Again, we recommend 303 Aerospace Protectant for its stellar finish and versatility.
That's it! You made it, and if you followed all of the instructions your wheels should look show-car ready. Step back, walk around your car a few times, and admire your handiwork.
New Car Smell Becomes NEUtral Car Smell April 22 2016
"How do I give my car that new-car smell?"
As Gizmodo's Rachel Swaby explains...you can't, but the clearest why comes from Toyota's own Janise Shard who said,
"The smell is mostly organic compounds in the vehicle off-gassing. Anything that is vinyl or plastic—the foam lamination on the seat surface, the plastic on the dash or on the door panel—it's the volatile organic compounds (VOCs) coming out of them that causes that smell."
http://gizmodo.com/5896801/what-exactly-is-that-new-car-smell
"But my car is 10 years old!"
Maybe we can sell you on NEUtral car smell instead - what's left after a thorough cleaning and decontamination (detailing technicians love that word). If you've had your car for a while, it's likely that the materials have finished off-gassing, and now you're left with a stale odor reminiscent of your last camping trip and takeout.
Why? The funk in your carpet and upholstery is causing that odor as microscopic particles decay. You will need to shampoo and scrub the offensive filth out. After, your car will smell fresh, like nothing at all, or like the perfumes in your cleaner.
This is your next step after vacuuming. At Klaren, we like to decontaminate the interior using steam, or odorless cleaners (in that order). Since you probably don't have a steamer dedicated for automotive use, we'll stick with the latter. You can also use fabric-safe all purpose cleaner (APC), a dilution of Woolite and water (1 part Woolite to 6 parts water, recommended by Recaro and professional detailers), or antimicrobial enzyme cleaners.
Prep: You will need...
- An assortment of carpet/upholstery brushes with nylon or natural bristles
- An old toothbrush (for nooks and crannies).
- Your favorite fabric cleaner (foaming, non-foaming, perfumed, odorless...)
- Leather / vinyl cleaner
- Leather / vinyl / plastic protectant (ex: 303 Aerospace Protectant)
- Assorted microfiber or cotton towels
Note: Once you use a microfiber towel for interior cleaning, do not use it on the car's paint.
Bonus: Wet/dry shop vacuum or portable carpet cleaner (ex: Bissell Little Green / Spot Clean)
Pro tips: Work in sections within arm's reach. For example, when working on the rear bench or carpet, I divide it into thirds -- left, center, and right passenger seat. Always read the instructions on your cleaners completely. The manufacturer didn't include them by accident. If you have never used a product before, check for color fastness by testing them in an inconspicuous area before using it on the whole interior.
Step 1: Mist the area with your cleaner and wipe or scrub. Nylon-bristle brushes will be the most aggressive, followed by natural bristle brushes, cotton towels, and microfiber towels.
"Should I scrub in circles, or scrub back and forth?" Either is fine, as long as you do not damage the fabric, and you're able to remove all of the filth.
This process works for all fabrics, carpet, and upholstery. Just take your time, patiently cleaning the entire interior. Don't miss a spot. Hard-to-reach areas are catch-alls for dirt and often the worst offenders. They require your attention like anything else. Slide seats forward, or backward. Tilt the seat backs. Do whatever is necessary. Anything worth doing, is worth doing right.
Step 2: Blot, wipe, or scrub the section with a cotton or microfiber towel to absorb moisture and dirt. We recommend light-colored towels, so you can inspect as you go. It's the white glove test of interior cleaning. You will need more than one. If your towel comes up stained, repeat steps 1 and 2.
Bonus: Lucky folks with a wet vacuum, extractor, or carpet cleaner can speed up this step by sucking the filth away, but this doesn't exempt you from the light towel test.
Step 3: Seal leather, plastic, and vinyl surfaces using a suitable product. 303 Aerospace Protectant is exceptional for its effectiveness and versatility. Its ability to hydrate and protect from sun damage while leaving a factory-fresh appearance is second to none! Mist your product onto a towel or foam applicator and massage it into the surface. Buff it off with a clean, dry towel.
Note: Applying leather/vinyl protectant to steering wheels isn't always advised because it makes the wheel slippery. If you insist, do not apply protectant liberally. Ensure that it is buffed off completely. Be careful, and grip the steering wheel before moving the car to test.
That's it! Inspect your work. Did you make sure to clean the vents and the dashboard? What about the rear shelf? Take your time, be thorough, and have fun!
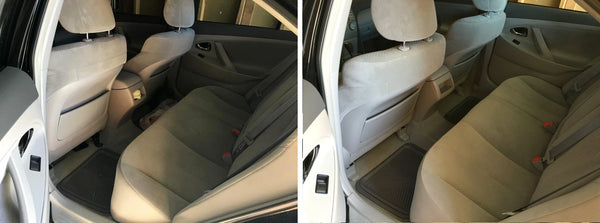
Spring Cleaning! - A Fresh Interior in 15 Minutes or Less March 24 2016
You spend most of your time inside the car, so I think it's a logical place to start your detailing journey, particularly for novices.
This is true if the weather has been anything less than cooperative. You can pull the car into your car port, or garage out of the elements and get started immediately. There is little risk of damaging and scratching surfaces, so the process is more user friendly. That, and I haven't met a person who doesn't know how to vacuum. Let's get started.
Step 1: Remove all large items from the inside of your car. That is: everything that can't, or shouldn't be vacuumed. Don't miss a spot. Empty the glove compartments and center console. Remove the floor mats. Remove the old, crumpled receipts and the napkins from your door pockets. Dig under the seats and pull out those old water bottles, kids' toys, makeup or anything else that rolled away.
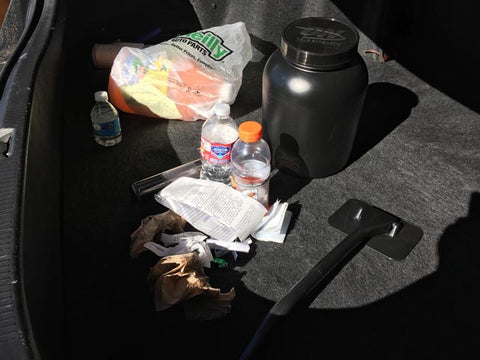
It's almost embarrassing to see how much trash you've lived with, and that's why it has to go!
When in doubt, refer to the flow chart. If I had 15 minutes to clean my interior before a date, this is where I would start.

Step 2: Dust and vacuum to remove loose material. Anything more stubborn will have to be scrubbed out. Vacuum all surfaces. What can't be reached or removed with a vacuum can be whisked away with a damp microfiber towel. Cotton towels will work, but microfiber is a magnet for dirt.
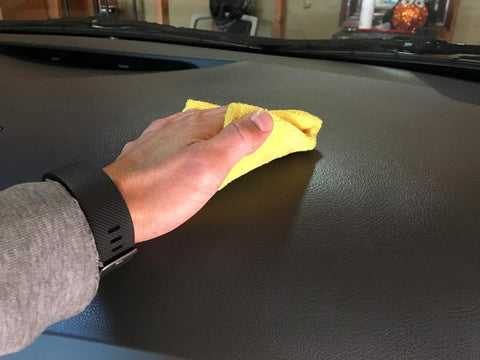

If your vacuum has a brush attachment, I encourage you to use it to avoid scratching soft leather or fabric. Don't forget to vacuum crevices and seams. Filth collects in those places. When working on the seats and rubber trim, gently pry the material open and run your vacuum's crevice tool along the path to remove embedded dirt. You might have to loosen stuck material with a brush. I like to use a cheap toothbrush, or a paint brush with stiff bristles. The bristles are stiff enough to get the job done, but soft enough to avoid causing damage.
Here's your checklist:
- Headliner
- Dashboard
- Vents
- Door panels, sills, and jambs
- Buttons, knobs, and switches(radio, window, and others)
- Note: rock the buttons back and forth as you clean them to expose hidden surfaces
- Cup holders
- Storage compartments
- Seats (in, on, around, and under)
- Carpets
- Rear shelf
Step 3: Put back the items that weren't trash and belonged in the car. Original equipment is a given, but don't forget the little things. Use this list as a guide:
- Removable carpets
- Manuals, booklets, and literature
- Vehicle registration
- Jumper cables and tools
- Umbrellas
- Sun Shade
- First-aid kit
- Chargers
Put everything away neatly, out of sight if possible. Remember: a place for everything, and everything in its place. It may take more than 15 minutes, especially if you're overdue, but speed comes with experience. It's more important to do the job correctly than it is to do it quickly, so take your time. Remember: if your car was being judged, these are the qualities that can make you a winner.
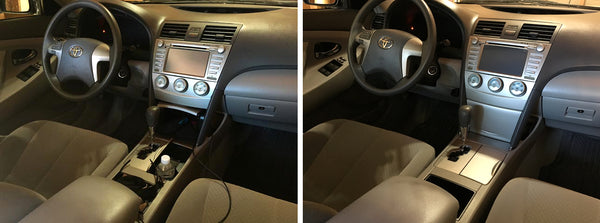
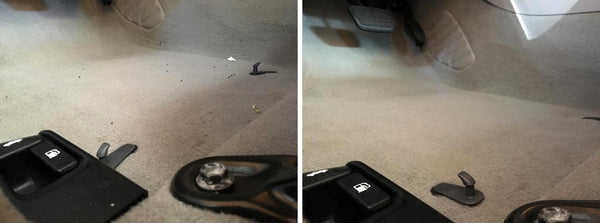
Before After
Concours Clean and You March 17 2016
Every year, the world's most beautiful and valuable vehicles and their owners assemble for a public showcase. In detailing circles, these are known as "Concours" events.
Owners and custodians display their vehicles to the public and to judges with discriminating taste, whose job is to evaluate the cars based on their cleanliness, quality, and originality. The highest-scoring vehicles are often rarely driven and kept in private collections.
Your daily driver may be far from museum quality, so it seems like we're comparing apples to oranges, but the Concours has done something important for weekend warriors and detailing enthusiasts. It set the bar for quality, defining what a well-maintained car should look like.
With little effort, the cumulative effects of periodic cleaning can leave you with a vehicle in showroom condition, so it's important that you know where to start.
To make this easier, we can subdivide your car into five main sections:
- Interior
- Exterior
- Trunk / Storage Compartments
- Engine Bay
- Under-body
Your goal is to restore them to factory condition to the best of your ability, using the tools that work best for you. There are many ways to approach the detailing process, and you may or may not agree with ours, but the goal is the same. Focus on cleanliness, take pride in your work, and have fun!
Primer - A Word from the Author February 27 2016
Detailing doesn't have to be a career, but it can craft a rewarding lifestyle as a hobby. It fosters skills and habits that are transferable. Detailing can make you stronger physically and mentally. More importantly it's a labor of love, rooted in process, that never fails to give back. Every patron of the craft is given full creative license from the first day and their practice is honed with each new technique learned and hour spent working.
Physical labor is taking a back seat in the digital era. It seems old-fashioned, but it's irreplaceable, non-discriminating and universally appreciated. You can become a teacher, or a technician...a hobbyist, or a guru. It can spark an entrepreneurial flame and put money in your pocket if you need it to. No degree required--just devotion. Detailing can be your afternoon escape, or a gift you share with someone important.
Practice has made maintaining my own vehicles easier than ever. As a technician, I've helped clients preserve investments and memories, and I'm excited to share what I've learned. I'll lay out realistic guidelines for you that follow Concours principles, so you can create a show-car finish. We will use simple techniques and inexpensive tools that you may have around the house. As we work together, you will learn the skills necessary to achieve world-class results and have the cleanest car on the block!

